
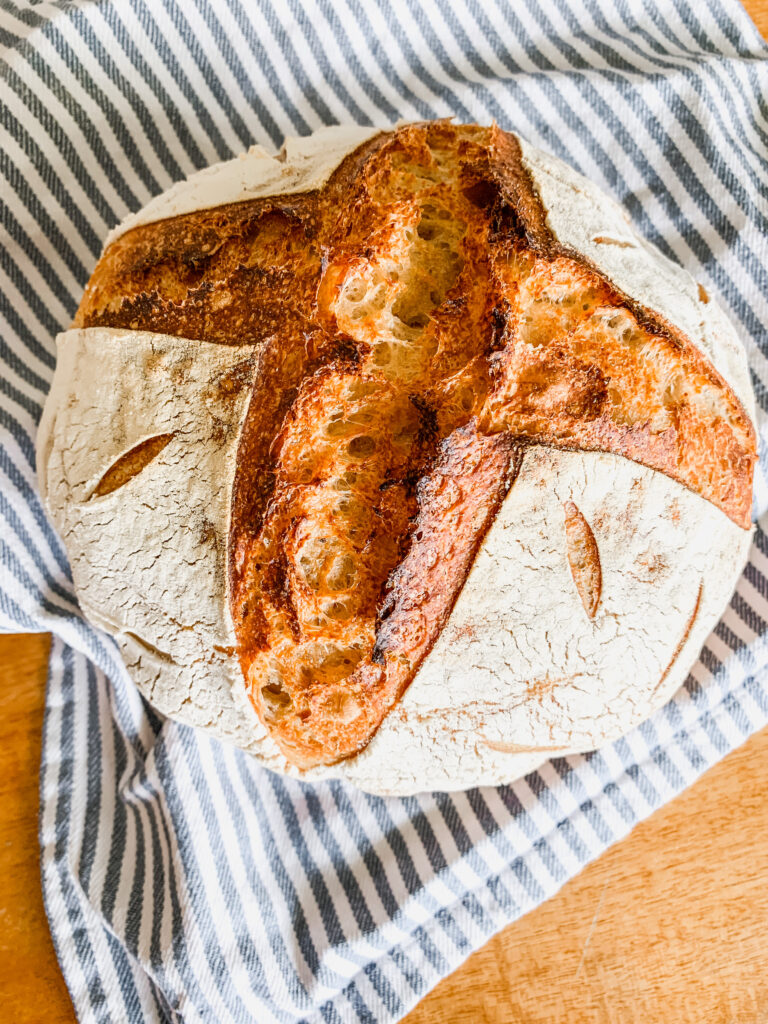
Gorgeous healthy, bubbly, packed with flavour artisan sourdough bread! This recipe is no knead, no fuss and great for beginner or advanced bakers alike!
This post contains affiliate links to products. I may receive a commission for purchases made through these links.
For someone who couldn’t eat bread for three years and tried this and could… to say I was thrilled out of my socks is an understatement!

If you’re unsure what all the hype about sourdough is, then pop over to my post How to make and maintain a sourdough starter where I chat about the health benefits and why it’s just so jolly wonderful!


There are so many sourdough recipes out there and I think the main reason is because everyone has different lifestyles and levels of wanting to be involved in the making of the bread and so some are super no fuss and others require more steps. I feel like my recipe is kinda somewhere in the middle, but you could adapt this to be much simpler if you prefer.
Prepare your starter
During Winter or the cooler months, I find I need to feed my starter the night before I want to bake. During Summer or the warmer months, I find I can get away with only a couple of hours. You will know if your starter is ready to use because it will be risen and bubbly. If it is still and not risen it might need a bit longer to feed or is too cold. If it is domed down in the middle, it has been fermenting (feeding) for too long. Don’t stress about it too much though as I’ve had loaves where I completely forgot to feed it and I still turned out fine!
What you will need
- Sourdough Starter (see my post on how to make your own!)
- Flour (unbleached) For this recipe I am using a combinations of Organic Spelt and Unbleached All Purpose
- Salt (natural and no added iodine)
- Bowl
- Spoon
- Kitchen Scales
- Some way to cover your bowl (ie, wet tea towel, cling wrap, plastic bag, bowl cover etc)
- Dutch Oven
- Optional: Banneton Basket and Dough Wisk
How to make Artisan Sourdough Bread
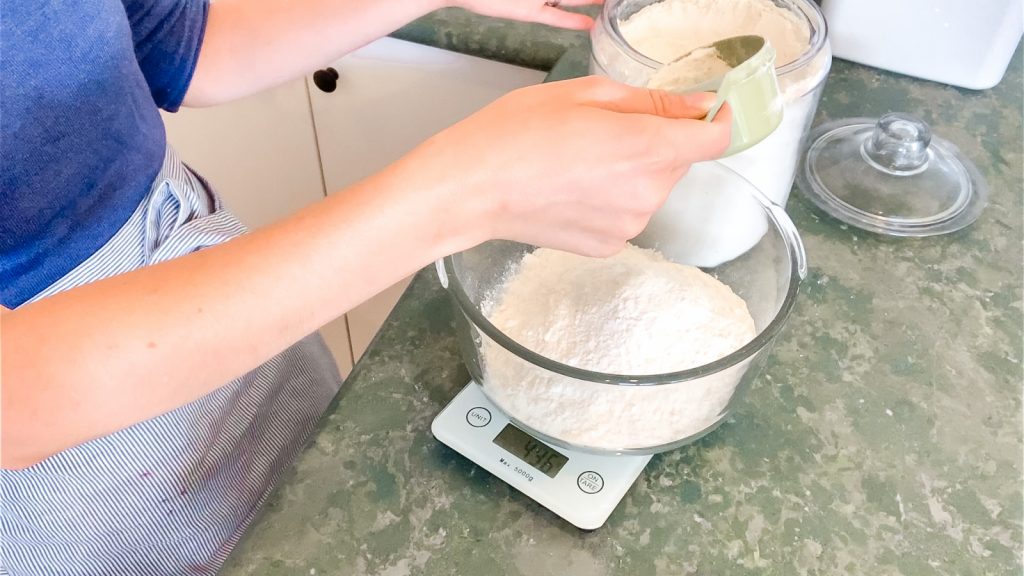
I recommend using a kitchen scales for measuring your ingredients when making this bread. It will insure you get consistent loaves that way as it’s hard to get an accurate amount of flour when using a cup.

For my recipe I use a total of 500g flour. You could use all one type of flour or any combination of flours. I usually find I get the best results from:
- 300g Unbleached all purpose Flour
- 200g Organic Spelt
Next weigh out 350g of warm water. I think ml and g are pretty interchangeable, but I’m just sticking with g to keep things consistent.
To the water, add 100g of starter.
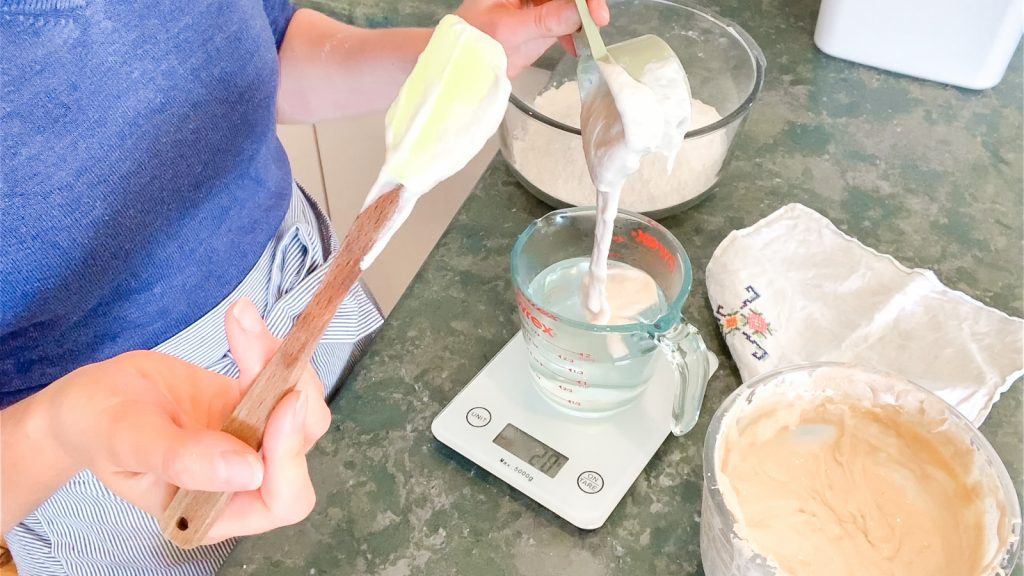
I love adding the starter to the water as it is a great way to check that your starter is ready because it will float on top of the water. It also makes it SOOO much easier to mix together because you’re not trying to mix gloopy starter and dough together.
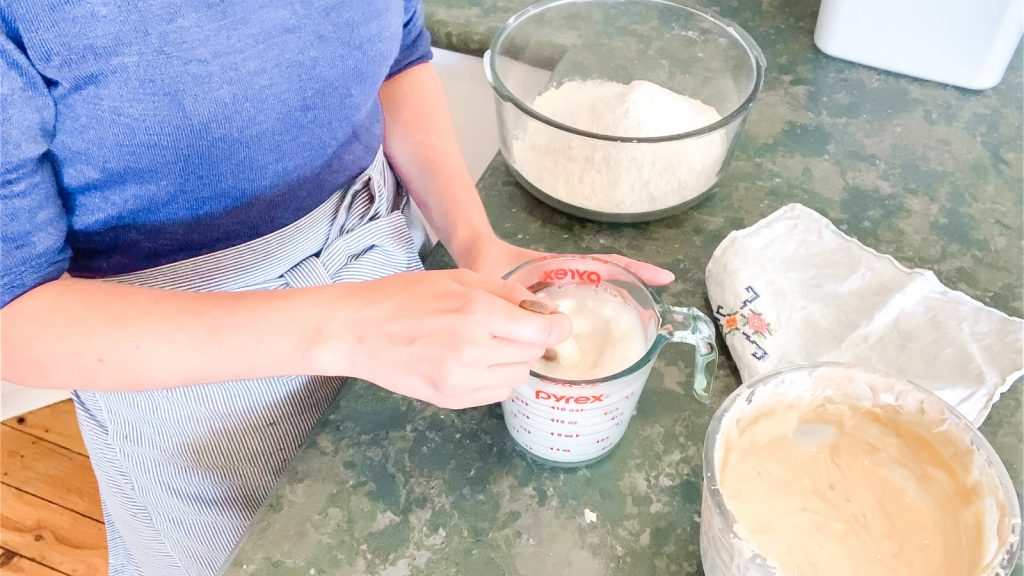
Oh and don’t forget the salt! 2 teaspoons or 10g of a natural salt.
Mix up the starter and the water and it will start to look a bit like milk. Don’t worry if there’s a few lumps.
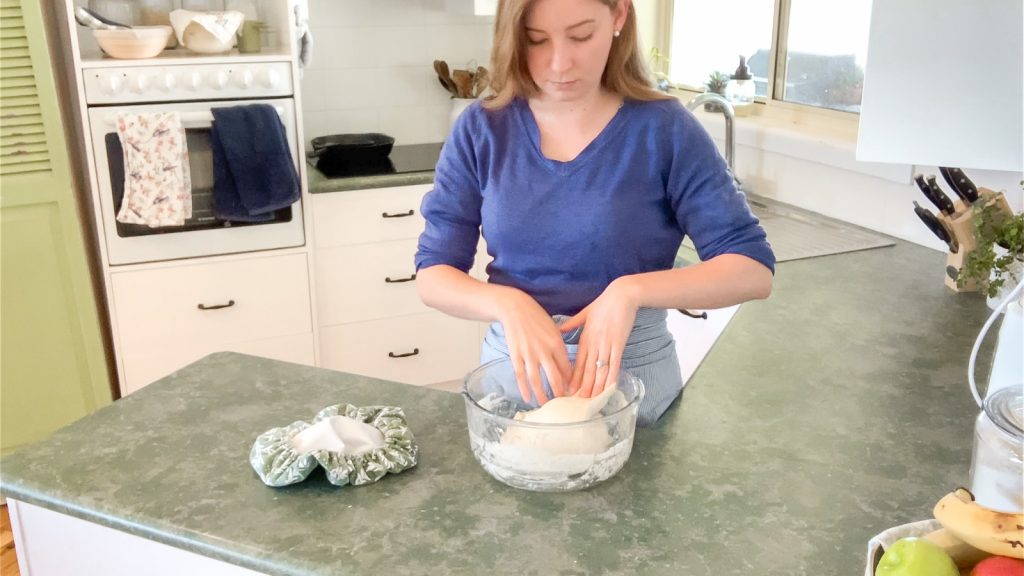
Next add the starter water mixture to the salt and flour and stir till combined.

I like to use my hands as it’s so much easier. The ideas here is just to combine the ingredients. We’re not kneading or anything. Just making sure the flour and water are combined.

Now we’re going to let this sit covered and in a warm spot for 30min.

This allows the gluten to begin to activate which will make it more of a dough and also lets the flour take on the water.
The times I give here are rough, I don’t get out a timer on a day to day bases of making this. These times do work, but as you get more familiar with the recipe you can just make it fit with your life style.
After 30min it’s ready for it’s first set of stretch and folds!
To do a stretch and fold, picture your loaf as a square. Pinch and lift up one side of “the square” and lift it as high as you can.
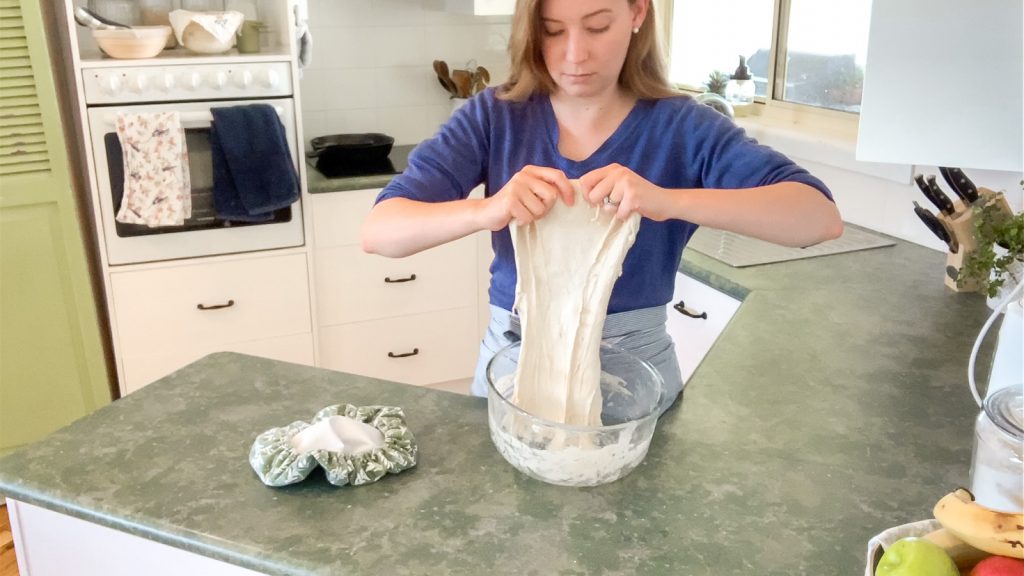
Then fold the side you just stretched down over the dough and turn the bowl 90 degrees ready to pick up the second side and repeat the process.
Do this on all four “sides”. (if you would like a better visual of this, I have a video at the bottom of this post.)
For the first stretch and fold, I do two sets, so I go all the way around “the square” and then all the way around again. So each “side of the square” gets two folds.
Now let the dough sit covered for 15min.
After the next 15min, do another set of folds, one stretch on each of the four “sides”.

Wait another 15 min and do the final stretch and fold. (see below for a timeline if this helps to make this clearer).
After the final stretch and fold smooth dough into a firm ball, pop it somewhere warm and leave it alone for 4 to 8 hours to do the long ferment. More or less depending on the temperature of your home. (Ideally between 24-28 degrees C)
After the dough has risen and doubled in size. It is time to transfer into a proving bowl or Banneton basket.
You can make your own proving bowl by lining a mixing bowl with a tea towel and dusting with flour.

However, Banneton Baskets are so cool and make the process so much easier and the loaves are so much more uniform and pretty. So I highly recommend getting one. I’ll link here to one like mine.

Gently remove the dough from the bowl and wok into a firm ball again. I find putting the dough on the bunch and pulling/rotating towards yourself to help with this. Stretch the skin tight and smooth and pop the smooth side down in the basket.
Pinch the sides together on the top side, sealing them together.

Now cover this with a bowl cover or plastic bag and pop in the fridge over night.
The next morning – Preheat your oven to 240 degrees C (464F) and have your Dutch oven in the oven pre heating also.

Working quickly, tip the dough out onto a sheet of grease proof paper and score the top. There are so many gorgeous designs for this!
A deep scoring helps give the dough room to rise more once in the oven. Shallow scoring can also be done for decoration.
Pop in the oven with the lid on the Dutch oven and cook for 25 min with the lid on and then 20 min at a reduced heat of 210C (410F) with the lid off. This will help to get a lovely golden crust.
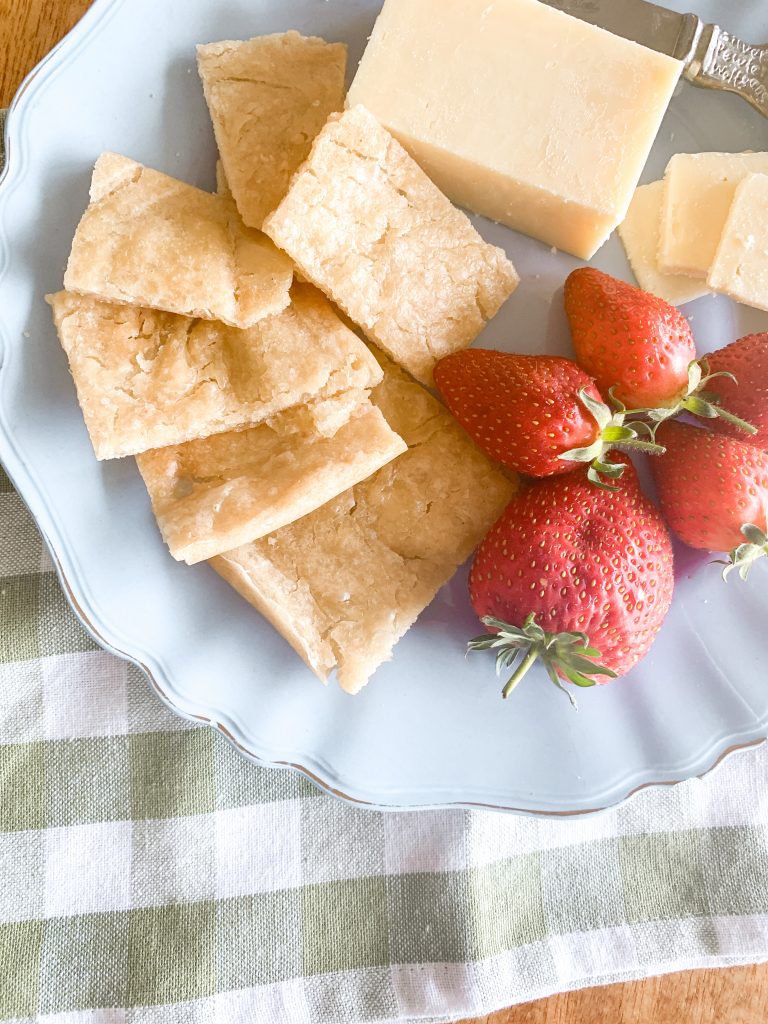
And there you have you beautiful healthy Artisan sourdough bread!!
Honestly, toasted with butter… Can’t get much better!


Here’s a bit of a break down, timeline, to hopefully make the process make more sense.
Day One
9pm – feed starter and leave on counter overnight (somewhere warm)
10am – Mix all ingredients together and let sit for 30 min
10:30am – Do two sets of stretch and fold. Let sit for 15min
10:45am – Do one set of stretch and fold, Let sit for 15 min
11am – Do final set of stretch and fold. Leave in bowl and let ferment for rest of day.
7pm – Check dough has risen, gently form into tight ball and transfer to proving basket. Pop in fridge over night.
Day Two
8am – Preheat oven, and cook.
9am – Tip out dough and score top. Place in dutch oven and cook!
10am – FEAST!!
Artisan Sourdough Bread
Ingredients
- 300g Unbleached All-Purpose Flour
- 200g Organic Spelt
- 2 tsp Natural Salt
- 350g Warm Water
- 100g Active Starter
Instructions
- Weigh out flour and add salt
- Weigh out water and starter and mix together
- Add liquids to flour and mix till combined
- Let sit, covered in a warm place for 30 min
- Do two sets of stretch and fold and let sit for 15min
- Do one set of stretch and fold and let sit for 15 min
- Repeat step 6
- Stretch the dough's skin to create a smooth ball and let prove and rise for approx 8 hours or until doubled in size.
- Gentle reshape into tight ball and transfer to Banneton basket, smooth side down.
- Cover and place in fridge overnight to long ferment
- The next morning. Preheat oven and dutch oven at 240 degrees C (464F)
- Tip dough out onto grease proof paper and score the top. Place in Dutch oven with lid on and back for 25min
- Remove lid and reduce heat to 210 for 20 min to brown crust.
- ENJOY!
When you try this recipe, please tag me on social media so I can see your lovely cooking!
Want more home cooking inspiration? Check out my other posts here!


[…] favourite way is simple spread on a delicious piece of sourdough bread! However the option are endless! Layer it between sponge cakes, dropped in the top of butterfly […]